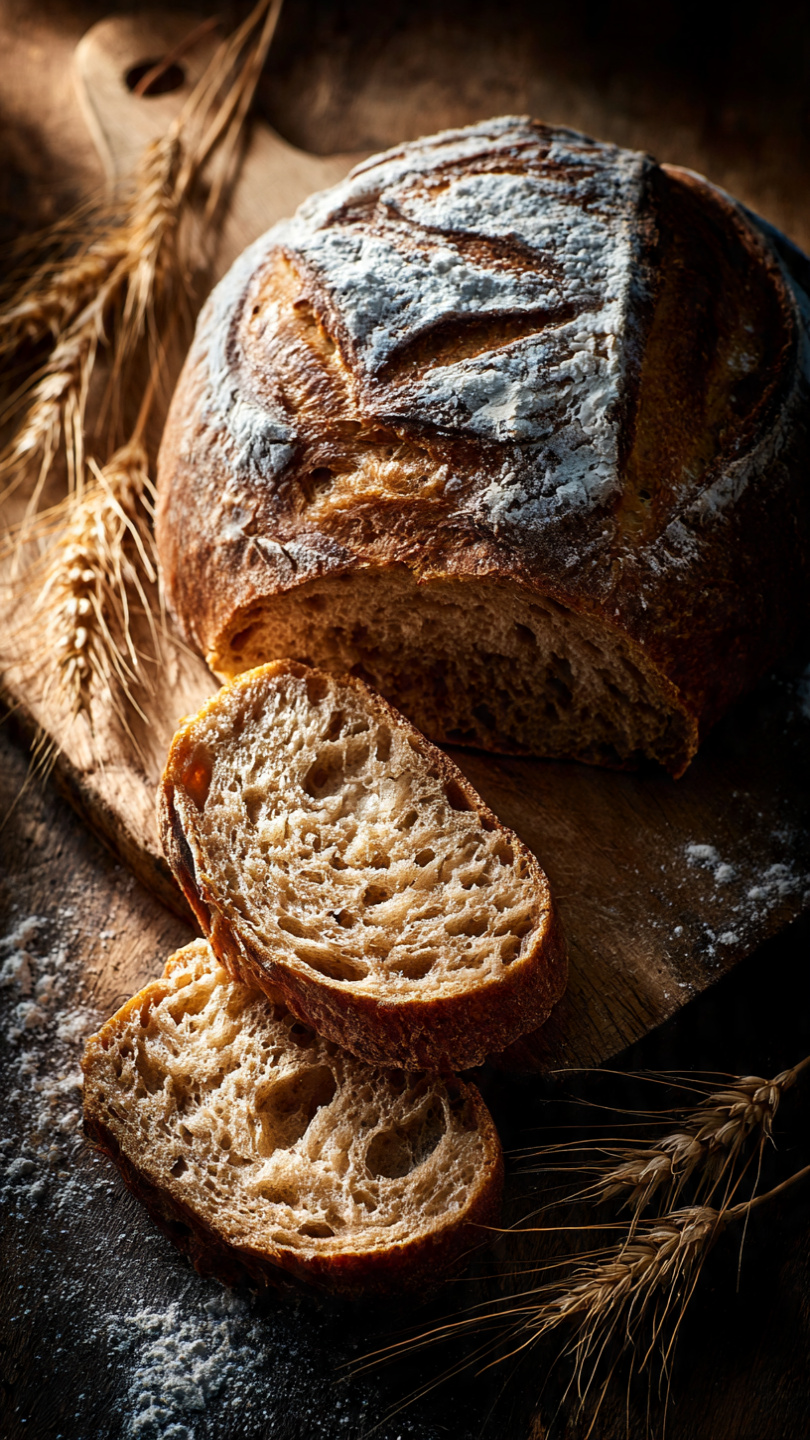
Whole Wheat Sourdough Bread
This whole wheat sourdough bread recipe uses an overnight method that's perfect for beginners and seasoned bakers alike, delivering a deeply flavored, hearty loaf with a crackly crust and chewy crumb.

The Overnight Whole Wheat Sourdough Bread You Will Actually Bake Every Week
If you have been intimidated by sourdough, this whole wheat sourdough bread recipe is your turning point. It is designed around an easy overnight method that does most of the heavy lifting while you sleep, so you wake up to dough that is ready to shape and bake into a gorgeous, hearty loaf with minimal fuss.
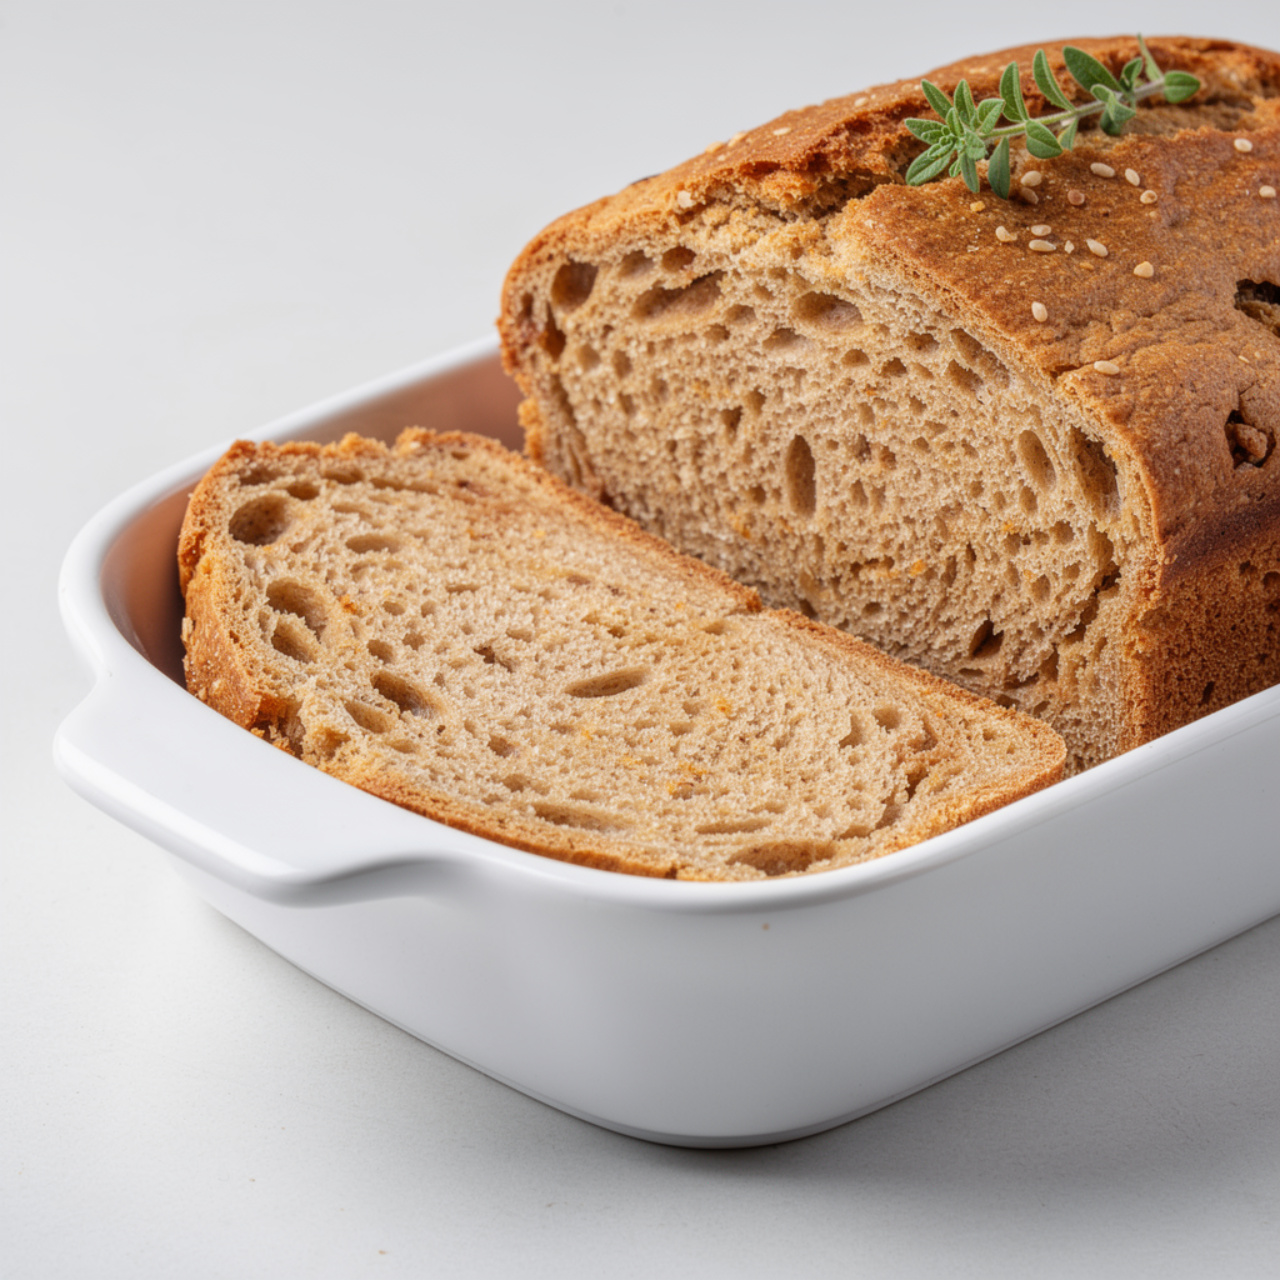
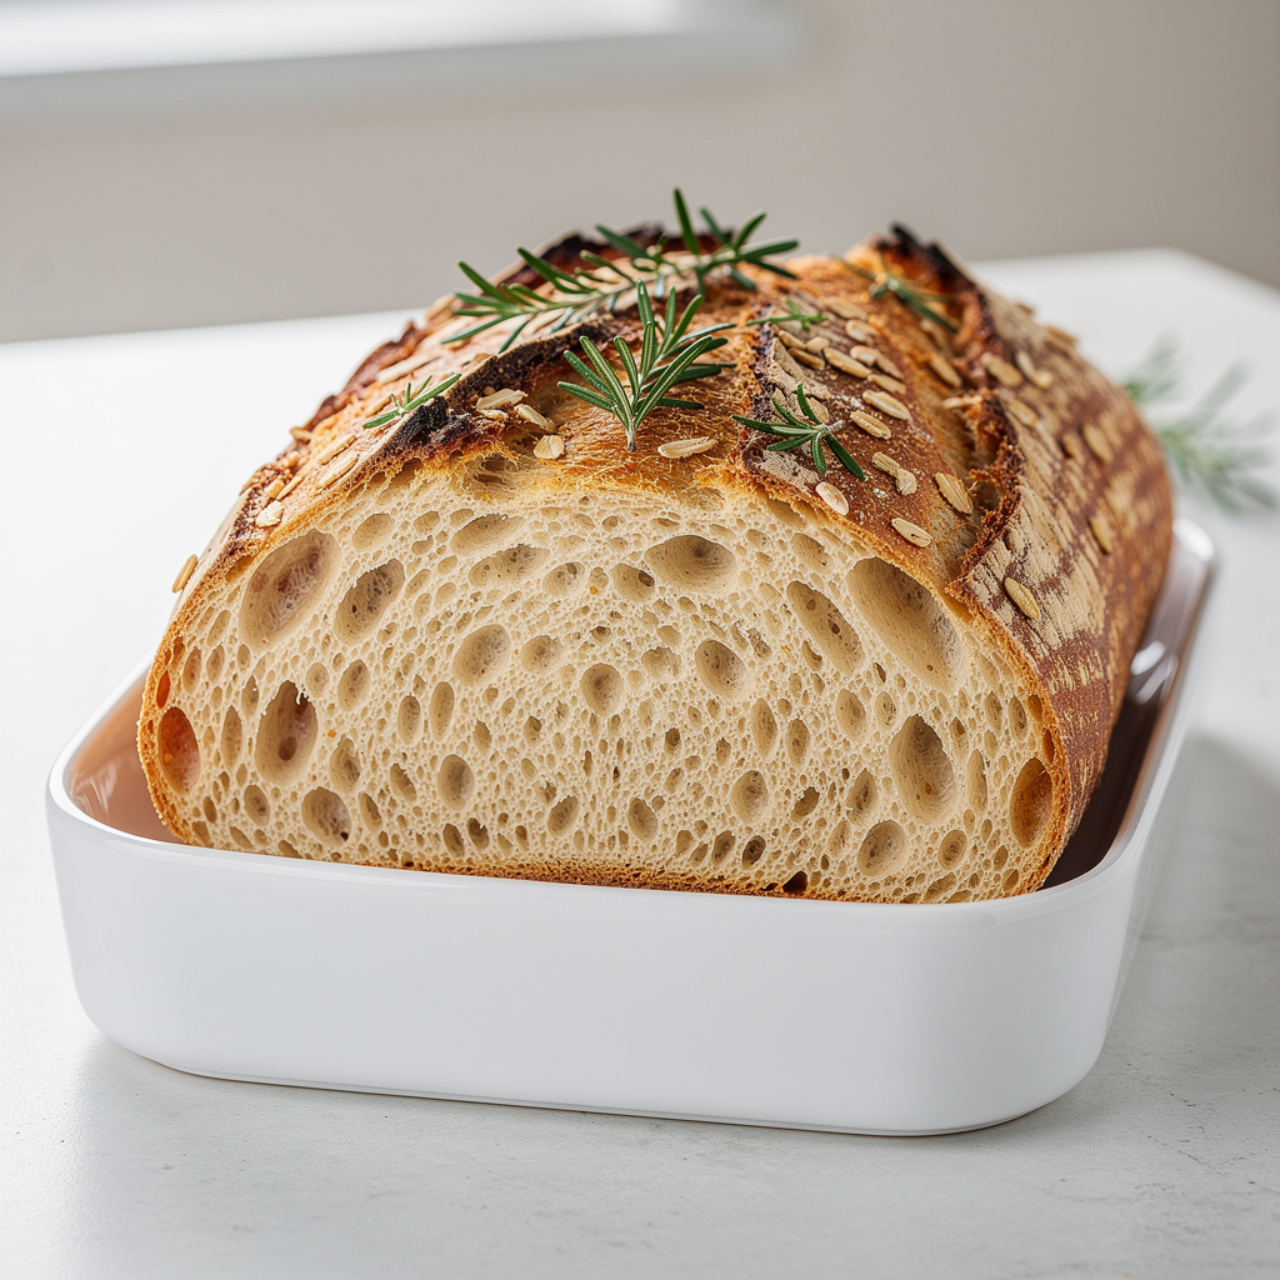
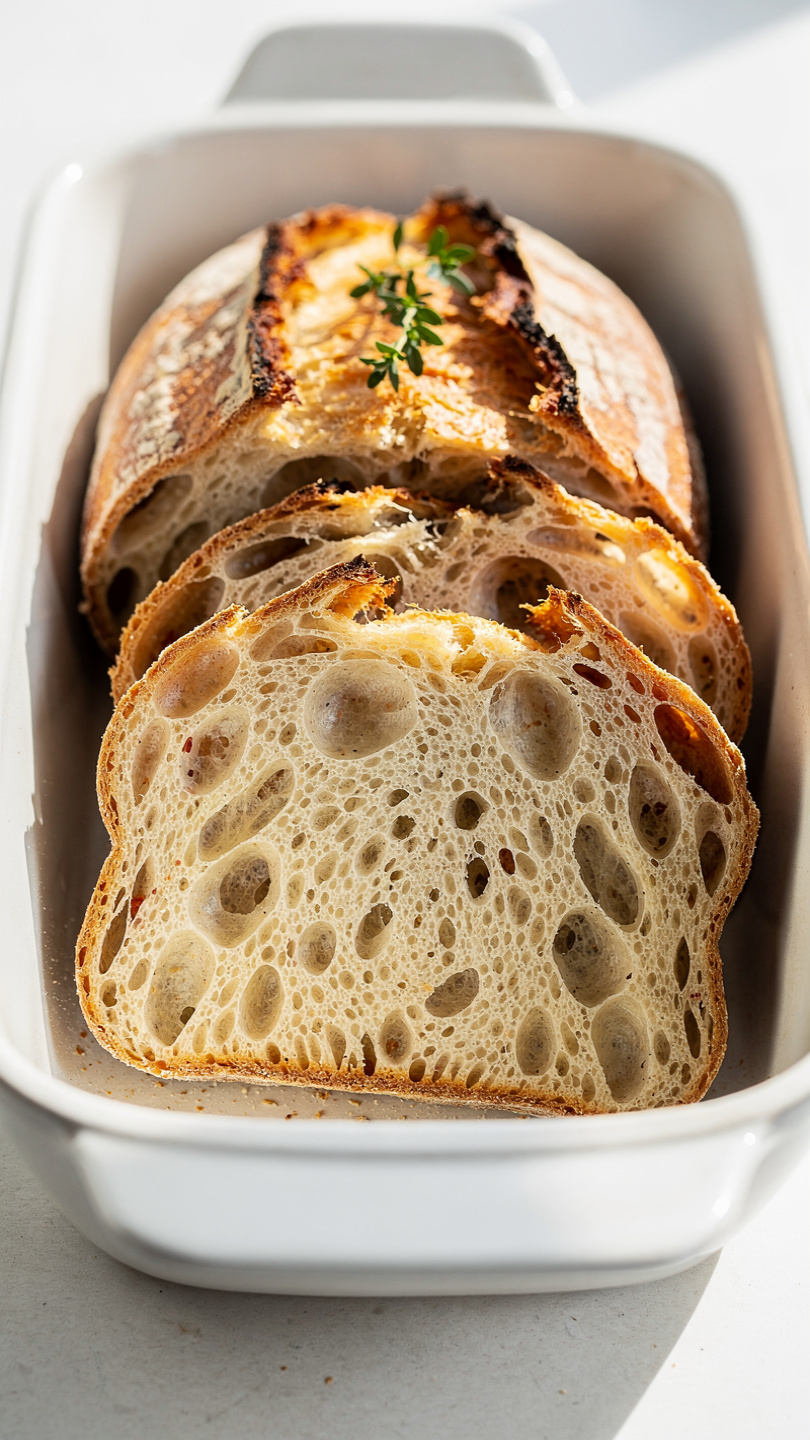
This is the kind of bread that fills your kitchen with the warm, yeasty smell of a proper bakery. The crust crackles when you pull it from the oven. The crumb is open and chewy. And the flavor, thanks to whole wheat flour and that slow overnight fermentation, is rich and nutty with just the right amount of tang.
Why This Overnight Sourdough Method Works So Well
The magic of this beginner overnight sourdough bread lies in time and temperature. Cold fermentation in the refrigerator slows down the yeast activity just enough to let the wild bacteria in your starter produce lactic and acetic acids gradually. The result is a more complex, deeply flavored loaf than anything you could achieve with a fast, same-day bake.
This is also why the easy overnight sourdough approach has become so popular with home bakers who want to bake sourdough bread daily or weekly without rearranging their entire schedule. You mix the dough before bed and bake it in the morning. Simple.
The key things that make this recipe succeed:
- A bubbly, active starter at peak activity
- Proper stretch-and-fold technique during bulk fermentation
- A screaming-hot Dutch oven to replicate a professional bread oven
- Patience when cooling (seriously, do not skip this step)
Having the right tools and ingredients in your kitchen makes a real difference with sourdough. A quality Dutch oven, a sharp bread lame, and a reliable proofing basket will dramatically improve your results from the very first bake.
Using Whole Wheat Flour in Sourdough
Whole wheat flour brings a nutty, slightly earthy depth to sourdough that plain white flour simply cannot match. It also ferments faster because the bran contains natural sugars and wild yeast, which means your overnight sourdough bread recipe with starter will move along efficiently without needing extra help.
In this recipe, whole wheat flour is blended with a portion of bread flour. That combination gives you the flavor and nutrition of whole grains alongside the gluten strength needed for a proper oven spring and open crumb. Pure whole wheat loaves can be dense and heavy. This blend keeps things balanced and genuinely delicious.
Baker's Tip: Your sourdough starter should be at peak activity when you mix the dough. Feed it 4 to 6 hours before you plan to start, and look for it to be domed, bubbly, and roughly doubled in size. A float test (a spoonful dropped in water should float) is a reliable quick check.
How to Shape and Score Your Loaf
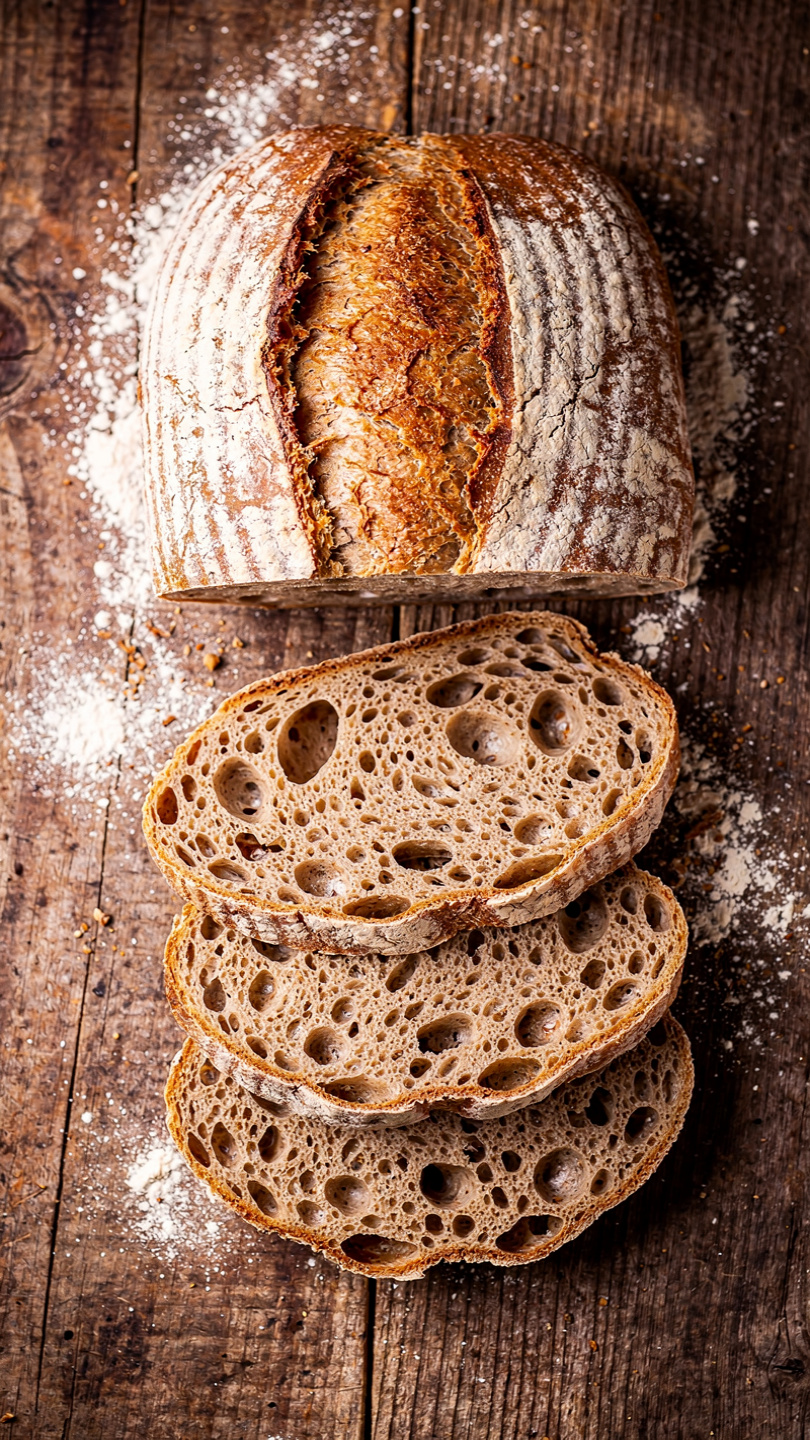
Shaping is where a lot of beginner bakers lose confidence, but it does not need to be perfect. The goal is to build surface tension on the outside of the loaf so it holds its structure during baking. A tight round boule works beautifully in a Dutch oven, and it is forgiving even if your technique is not quite textbook yet.
Scoring, that decisive slash across the top of the loaf, is not just decorative. It controls where the bread expands during baking. A single score at a 30 to 45 degree angle, about half an inch deep, gives the loaf room to bloom dramatically in the oven.
Do not be timid with your lame. A confident, swift cut prevents the blade from dragging and deflating the dough.
Ready to make it? Here is the full step-by-step recipe:
Whole Wheat Sourdough Bread
This whole wheat sourdough bread recipe uses an overnight method that's perfect for beginners and seasoned bakers alike, delivering a deeply flavored, hearty loaf with a crackly crust and chewy crumb.
Ingredients
- 2 cups whole wheat flour, stone-ground preferred
- 1 cup bread flour, plus extra for dusting
- 3/8 cup active sourdough starter, fed and bubbly, at peak activity
- 1 1/4 cups warm water, around 80 degrees F
- 1 1/2 tsp fine sea salt
- 1 tbsp honey, optional, adds subtle sweetness and helps browning
Instruction
In a large mixing bowl, combine the warm water and active sourdough starter. Stir until the starter is fully dissolved and the mixture looks milky.
Add the honey (if using), whole wheat flour, and bread flour. Mix with a sturdy spatula or your hands until no dry flour remains. The dough will feel shaggy and rough at this stage. Cover the bowl and let it rest for 30 minutes (this is the autolyse stage).
Sprinkle the sea salt over the dough and work it in using your fingers, pinching and folding until fully incorporated.
Perform 4 sets of stretch-and-folds over the next 2 hours, spacing each set about 30 minutes apart. To do a set, grab the dough on one side, stretch it upward as far as it will go without tearing, then fold it over to the opposite side. Rotate the bowl and repeat 3 more times per set.
After the final fold, the dough should feel smoother, slightly domed, and have visible bubbles on the surface. Cover the bowl tightly with plastic wrap or a lid.
For the overnight method: place the covered bowl in the refrigerator and cold-ferment for 10 to 14 hours (or up to 18 hours). This long, slow rise is what develops the complex sourdough flavor.
The next morning (or when ready to bake), remove the dough from the refrigerator. Gently turn it out onto a lightly floured surface. Shape it into a tight round boule or an oval batard by folding the edges toward the center, then flipping it seam-side down and using cupped hands to drag it gently across the counter to build surface tension.
Place the shaped loaf seam-side up into a well-floured proofing basket (banneton) or a bowl lined with a well-floured kitchen towel. Cover loosely and let it proof at room temperature for 1 to 2 hours while you preheat your oven.
Place a Dutch oven with its lid inside your oven and preheat to 500 degrees F (260 degrees C) for at least 45 minutes. You want that vessel scorching hot.
Cut a piece of parchment paper to fit the bottom of your Dutch oven. Carefully flip the proofed dough onto the parchment, seam-side down. Using a sharp bread lame or razor blade, score the top of the loaf with one confident slash at a 30 to 45 degree angle, about 0.5 inch deep.
Using oven mitts, carefully remove the Dutch oven lid and lower the dough (on the parchment) into the pot. Replace the lid and bake covered for 20 minutes. This traps steam and creates the signature open crumb and crackly crust.
Remove the lid, reduce the oven temperature to 450 degrees F (230 degrees C), and bake uncovered for an additional 20 to 25 minutes until the crust is deep mahogany brown.
Lift the loaf out using the parchment and transfer it to a wire cooling rack. Resist the urge to cut into it immediately. Let it cool for at least 1 hour before slicing. The interior is still finishing its bake as it cools.
Equipment
- Large mixing bowl
- Bench scraper
- Proofing basket (banneton) or bowl with kitchen towel
- Dutch oven (5 to 6 quart)
- Bread lame or sharp razor blade
- Wire cooling rack
- Parchment paper
- Instant-read thermometer (optional)
Notes
Serving, Storing, and Making It Part of Your Weekly Routine
This whole wheat sourdough bread is spectacular with just good butter and flaky salt. It also makes extraordinary avocado toast, exceptional grilled cheese, and arguably the best toast you have ever eaten with a soft-boiled egg.
For those who want to bake sourdough bread weekly, this recipe slots into a simple rhythm. Feed your starter Friday evening. Mix the dough Saturday night. Bake Sunday morning. By Sunday brunch, you have a fresh loaf that will carry you through the week.
Storage tips at a glance:
- Room temperature, wrapped in a kitchen towel: up to 3 days
- Sliced and frozen: up to 3 months
- Reheat from frozen in the toaster or a 350 degree F oven
Once you bake this overnight sourdough bread, the process will feel natural very quickly. The more often you bake it, the better you will get at reading your dough and adjusting for your kitchen's temperature and humidity. That intuition is what separates good home bakers from great ones, and it only comes from practice.