Sourdough Rye Bread Recipe (Deeply Flavorful and Perfectly Tangy)
This sourdough rye bread recipe delivers a deeply tangy, hearty loaf with a crackling crust and chewy crumb using a simple rye sourdough starter. Perfect for sandwiches, toast, or served alongside soup.

Why This Sourdough Rye Bread Deserves a Spot in Your Weekly Bake
There is something almost ancient about a dark, tangy loaf of sourdough rye bread. The smell alone, earthy and slightly sour, with hints of caraway drifting through the kitchen, has a way of making a house feel like a home. This rye sourdough recipe is the kind of bread that actually gets better as it sits, developing deeper flavor with every passing hour after it cools.
Whether you are new to working with a rye sourdough starter or you have been baking for years and want a reliable rye sourdough bread recipe to come back to, this one has you covered. It uses a blend of dark rye flour and bread flour, which gives you that signature bold rye flavor without sacrificing the open, chewy crumb we all love in a good sourdough loaf.
What Makes Rye Bread Sourdough Different
Rye flour behaves very differently than all-purpose or bread flour. It contains less gluten-forming protein and more pentosans, a type of fiber that absorbs water readily and creates a naturally sticky, dense dough. That stickiness is not a mistake. It is just rye doing its thing.
Because of this, a rye sourdough bread recipe relies more on proper fermentation and less on aggressive kneading. The wild yeast and bacteria in your rye sourdough starter do the heavy lifting, breaking down the dough's natural starches, building acidity, and creating that deeply complex, tangy flavor you cannot replicate with commercial yeast.
Chef's Tip: The colder your kitchen, the slower your fermentation. If your home runs below 68 degrees F in winter, add an extra hour or two to your bulk ferment and watch for visual cues like bubbles and a 50 to 75 percent rise rather than watching the clock.
Building and Maintaining Your Rye Starter
If you do not already have a rye starter, building one is completely straightforward. Mix equal parts dark rye flour and water by weight, stir, loosely cover, and feed daily. Within 5 to 7 days you will have a bubbly, fragrant rye starter recipe you can use indefinitely.
If you already maintain a white flour starter, convert it to rye by substituting rye flour in two or three consecutive feedings before your bake day. A fully active rye starter will double within 4 to 8 hours of feeding and smell pleasantly tangy, almost like yogurt or apple cider.
The right tools make this whole process smoother and more enjoyable. A good kitchen scale, a quality Dutch oven, and a proper banneton basket are the three things that genuinely transform home sourdough baking from frustrating to deeply satisfying.
Tips for Getting the Best Crust and Crumb
A few small decisions make a big difference in your final loaf:
- Cold retard is your friend. Shaping the dough and refrigerating it overnight is what gives rye sourdough bread its pronounced tang and makes it easier to score cleanly.
- Score confidently. Rye dough is sticky and dense. One bold slash at a 45-degree angle works better than several hesitant ones.
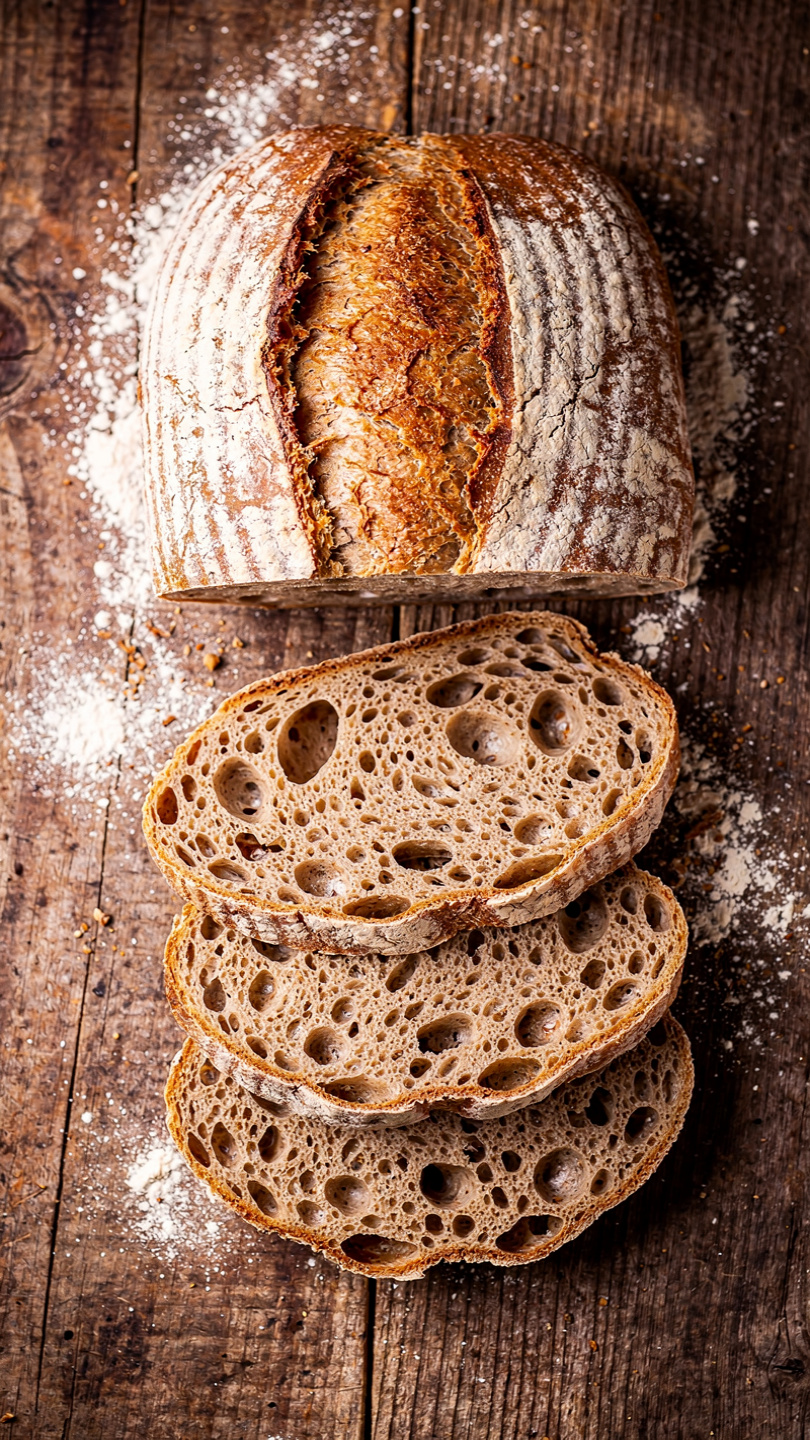
- Do not skip the rest after baking. This is the step most bakers skip, and it ruins an otherwise perfect loaf. Rye bread needs at least 1 full hour on the rack, preferably 2, before slicing. Cutting early releases steam and turns the crumb gummy.
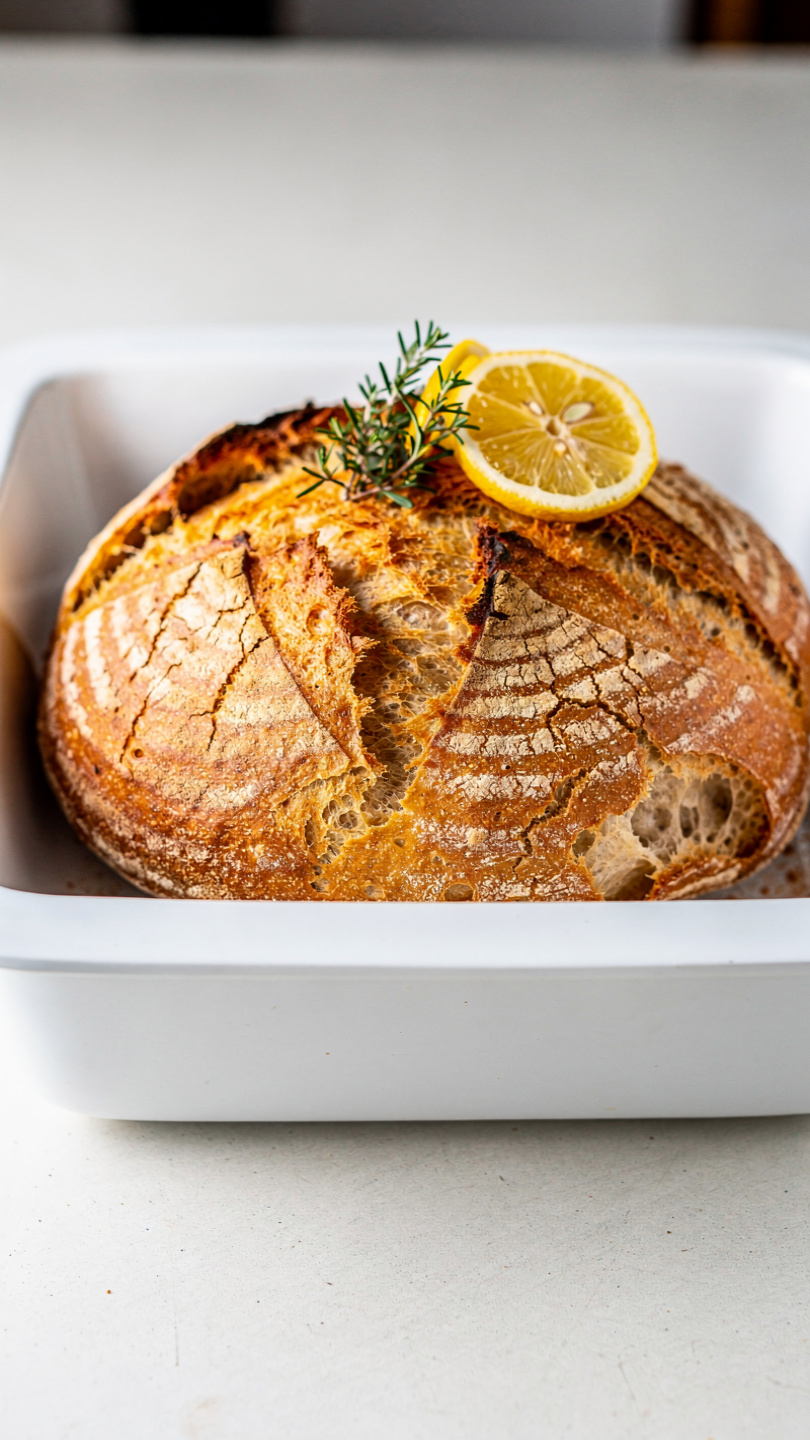
- Go for deep color. A mahogany-brown crust is not burned. It is where the flavor lives. Do not pull the loaf early out of nerves.
Chef's Tip: If the bottom of your loaf is browning faster than the sides, slide a second baking sheet under your Dutch oven as an insulating layer for the last 10 minutes of uncovered baking.
The Flavor Profile You Can Expect
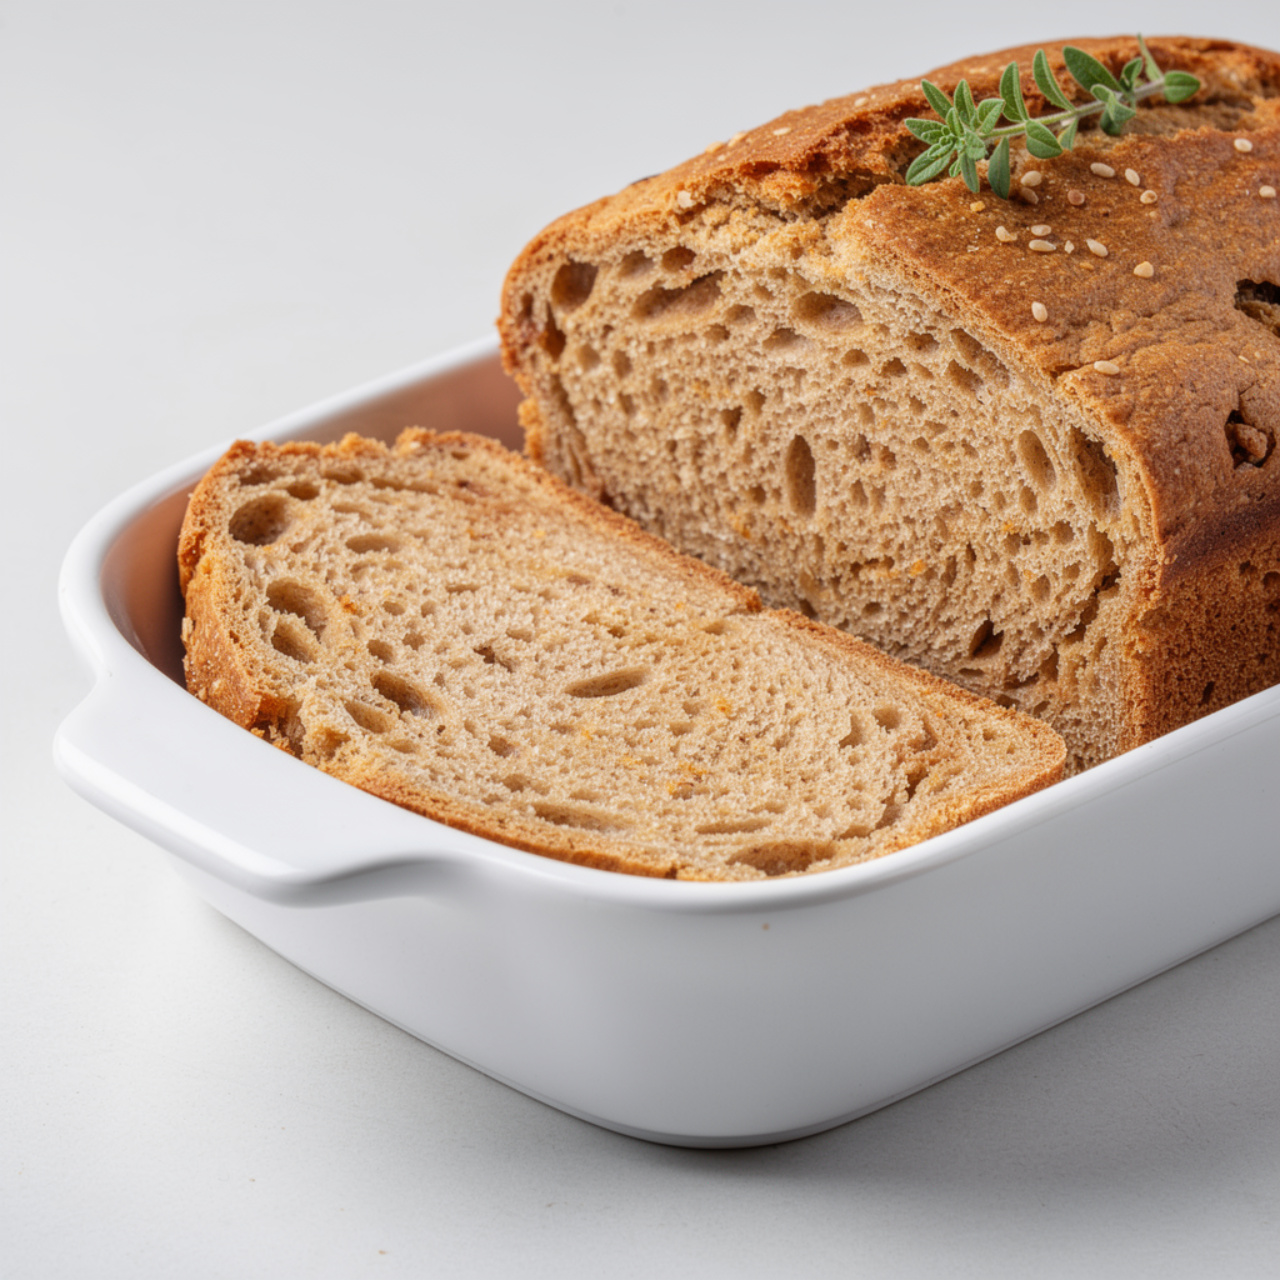
This rye sourdough recipe produces a loaf that is boldly tangy with a dense but not heavy crumb, a crackling crust, and a slightly moist interior that toasts beautifully. The optional caraway seeds add an herbal, anise-like warmth that is completely traditional in Eastern European and Scandinavian rye breads.
It is exceptional with salted butter, smoked salmon, sharp cheddar, or simply torn into chunks alongside a hearty winter soup.
Ready to bake your best loaf yet? Here is everything you need:
Sourdough Rye Bread Recipe (Deeply Flavorful and Perfectly Tangy)
This sourdough rye bread recipe delivers a deeply tangy, hearty loaf with a crackling crust and chewy crumb using a simple rye sourdough starter. Perfect for sandwiches, toast, or served alongside soup.
Ingredients
- 1/2 cup active rye sourdough starter, fed and bubbly, at peak activity
- 1 1/2 cups dark rye flour, whole grain preferred
- 2 cups bread flour, plus more for dusting
- 1 1/4 cups warm water, around 80 degrees F
- 1 1/2 tsp fine sea salt
- 1 tbsp caraway seeds, optional but traditional
- 1 tbsp honey or molasses, molasses deepens color and flavor
Instruction
Feed your rye sourdough starter 6 to 12 hours before baking. It should be bubbly, doubled in size, and smell pleasantly sour before you use it.
In a large mixing bowl, combine the warm water, active rye starter, and honey or molasses. Stir well until fully dissolved and slightly foamy.
Add the dark rye flour, bread flour, salt, and caraway seeds (if using). Mix with a dough whisk or sturdy spatula until a shaggy, sticky dough forms. Do not worry if it looks rough at this stage.
Cover the bowl with a damp cloth or plastic wrap and let the dough rest for 30 minutes (autolyse). This step improves gluten development without any kneading.
After the rest, perform 4 sets of stretch-and-folds spaced 30 minutes apart. To do one set, wet your hand, grab one side of the dough, stretch it up, and fold it over the center. Rotate the bowl 90 degrees and repeat four times per set.
After the final fold, cover the bowl and let the dough bulk ferment at room temperature (70 to 75 degrees F) for 4 to 6 hours, or until it has grown by about 50 to 75 percent and looks airy with bubbles on the surface.
Lightly flour your work surface and gently turn the dough out. Shape it into a tight oval or round boule by pulling the sides underneath and creating surface tension. Place it seam-side up into a well-floured banneton or a bowl lined with a floured kitchen towel.
Cover and refrigerate overnight for 8 to 16 hours. This cold retard develops the sour flavor and makes the dough easier to score.
About 45 minutes before baking, place your Dutch oven into the oven and preheat to 500 degrees F (260 degrees C). Allow the Dutch oven to heat for at least 30 minutes.
Turn the cold dough out onto a sheet of parchment paper. Score the top with a lame or sharp serrated knife at a 45-degree angle, making one confident slash about 0.5 inch deep.
Carefully lower the dough on the parchment into the hot Dutch oven. Cover with the lid and bake for 20 minutes. Remove the lid, reduce the oven temperature to 450 degrees F (230 degrees C), and bake for an additional 22 to 25 minutes until the crust is deep mahogany brown.
Remove the loaf from the Dutch oven and transfer to a wire cooling rack. Resist cutting into it for at least 1 hour. Rye bread needs time to set its crumb or it will be gummy inside.
Equipment
- Large mixing bowl
- Dough whisk or sturdy spatula
- Banneton proofing basket or bowl with kitchen towel
- Dutch oven (5 to 7 quart)
- Bread lame or sharp serrated knife
- Parchment paper
- Wire cooling rack
- Kitchen scale (recommended)
Notes
Serving, Storing, and Variations
Serving ideas: Slice thick for open-faced sandwiches topped with cream cheese and cucumber, or thin for a charcuterie board alongside pickles and hard cheeses.
Storage: Wrap in a kitchen towel and keep at room temperature for up to 3 days. Freeze sliced portions in an airtight bag for up to 2 months and toast directly from frozen.
Variations to try:
- Add 2 tablespoons of toasted sunflower seeds or pumpkin seeds to the dough for extra texture
- Swap the honey for molasses to deepen the color and add a subtle bittersweet note
- Increase the rye flour ratio to 2 cups rye and 1.5 cups bread flour for a more assertive, traditional rye sourdough flavor
Once you bake this loaf, it is very hard to go back to store-bought rye bread. The flavor, the crust, the satisfaction of slicing into something you built from a living starter and a few simple ingredients. That is what makes this how to make rye bread with sourdough starter worth every hour of fermentation time.