Sourdough Bread Machine Recipe (Crispy Crust, Chewy Crumb)
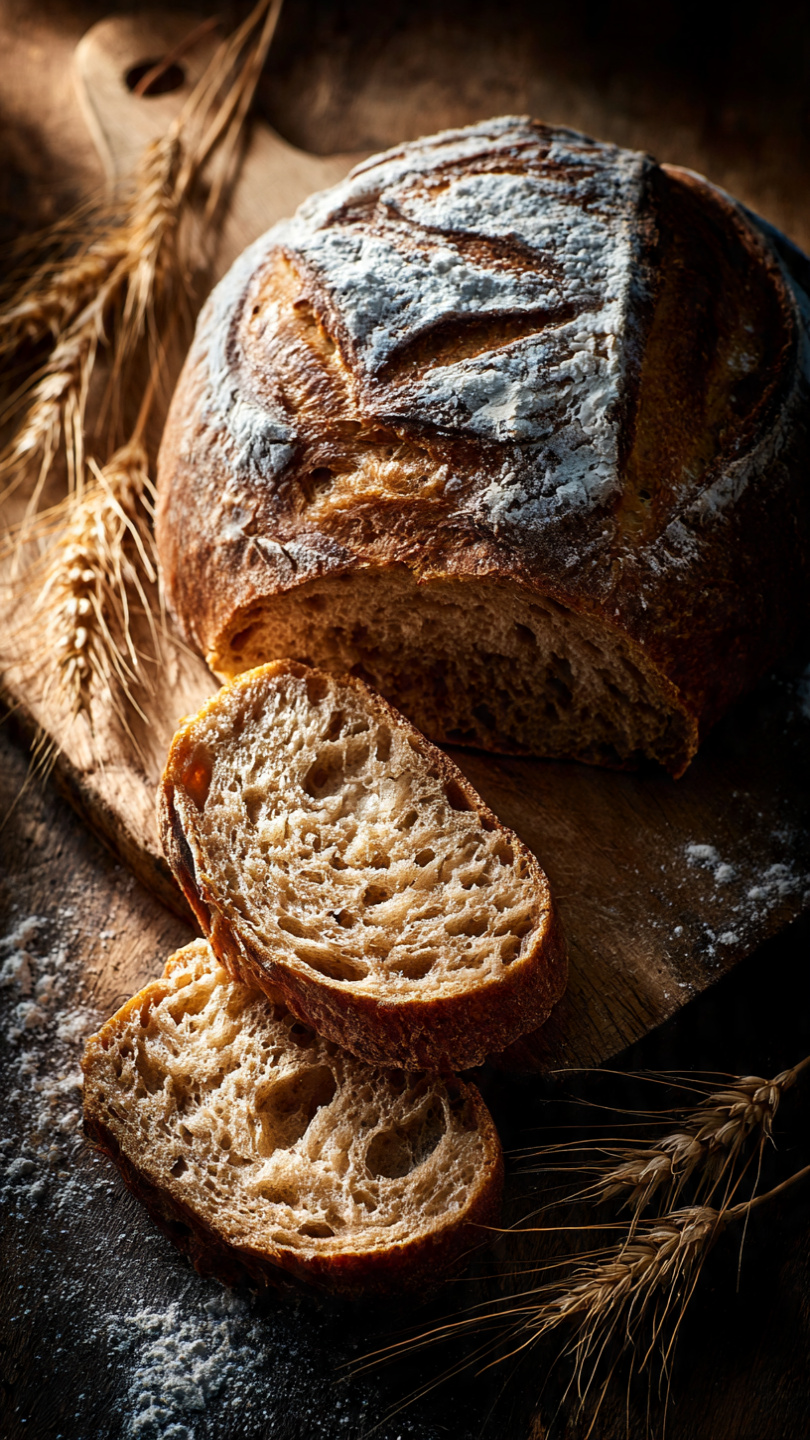
Learn how to make a perfectly tangy sourdough bread machine recipe with minimal effort and maximum flavor. Crispy crust, open crumb, and that signature sour bite you love.

The Easiest Way to Start Making Sourdough Bread at Home
If you have been wondering how to start sourdough bread or how to get started with sourdough without the intimidating all-day process, this bread machine sourdough recipe is your answer. You get that deeply tangy flavor, that blistered golden crust, and that open, chewy crumb, but the bread machine handles all the heavy lifting for you during the mix and first rise. No standing over a dough bowl. No complicated stretch-and-fold schedules. Just a confident, satisfying loaf that will make your whole kitchen smell incredible.
This is the recipe that takes the mystery out of how to start making sourdough bread, even if you have never baked a single loaf in your life.
Why a Bread Machine Changes the Sourdough Game
Let's be honest: the traditional sourdough process is beautiful, but it is also a commitment. Hand-mixing, multiple folds, precise timing, bulk fermentation that can stretch across an entire day. That is wonderful on a lazy weekend, but it is not realistic for most people who just want to bake sourdough bread daily without rearranging their entire schedule.
Using a bread machine for the dough cycle solves that problem. The machine kneads the dough far more consistently than most home bakers can by hand, develops strong gluten structure, and manages the first rise in a controlled environment. Your job is to shape, proof, and bake. Simple.
Chef's Tip: Use the bread machine for mixing and the first rise only. Finishing the loaf in a preheated Dutch oven is the secret to that shattering, professional-grade crust you see at artisan bakeries.
What Do You Need to Start Sourdough in a Bread Machine?
Before we get into the recipe, let's talk about what you actually need. The ingredient list is beautifully short: active sourdough starter, bread flour, water, and salt. That is it. But the tools you use genuinely matter here, especially when it comes to achieving that signature crust.
A quality bread machine with a reliable Dough cycle, a heavy Dutch oven that holds heat well, and a sharp bread lame for scoring will take your results from good to exceptional. These are not just nice extras; they are the difference between a loaf you are proud of and one that is dense and pale.
How to Get Your Sourdough Starter Ready
This is the step where most beginners get tripped up. Your starter is the engine of this bread. If it is not active and bubbly, your loaf will not rise properly, and no amount of technique will fix that.
Here is how to start sourdough on the right foot:
- Feed your starter 4 to 8 hours before you plan to bake.
- It should double in size and be visibly bubbly on top and through the sides of the jar.
- It should pass the float test: drop a small spoonful into a glass of water. If it floats, it is ready.
- The smell should be pleasantly sour and slightly fruity, not overly alcoholic or unpleasant.
If your starter is not behaving, feed it twice a day for two to three days before you attempt this recipe. A well-maintained starter is the single biggest factor in a successful loaf.
Chef's Tip: If you are just learning how to get started with sourdough, keep your starter in a warm spot in the kitchen (around 72 to 78 degrees F) and feed it at consistent intervals. Consistency builds a stronger, more predictable culture.
The Flavor Secret: Cold Proofing
Once the bread machine finishes the dough cycle and you have shaped your loaf, you have a choice: proof it at room temperature for 1 to 2 hours, or cover it and refrigerate overnight.
Cold proofing overnight in the refrigerator is one of the best things you can do for flavor. The slow, cold fermentation gives the wild yeast more time to develop those complex, deeply sour notes that make sourdough so distinctive. It also makes the dough easier to score cleanly right out of the fridge.
This is how professional bakers get that bold, layered sour flavor that you simply cannot rush. If you want to know how to bake sourdough bread daily, make the dough the night before, refrigerate it, and bake fresh in the morning. The routine practically runs itself.
Tips for a Perfectly Crispy Crust
- Preheat your Dutch oven inside the oven for at least 30 minutes before baking. This flash of intense heat is what creates oven spring and that crackly crust.
- Score confidently. A single clean slash, about half an inch deep, guides the expansion of the loaf and gives it that rustic, bakery-style look.
- Do not skip the cool. Let the baked loaf rest on a wire rack for a full hour before slicing. The crumb is still setting as it cools, and cutting too early gives you a gummy, undercooked texture even if the outside looks perfect.
Ready to bake your best loaf yet? Here is everything you need in one place:
Sourdough Bread Machine Recipe (Crispy Crust, Chewy Crumb)
Learn how to make a perfectly tangy sourdough bread machine recipe with minimal effort and maximum flavor. Crispy crust, open crumb, and that signature sour bite you love.
Ingredients
- 1 cup active sourdough starter, fed and bubbly, at peak activity
- 3/4 cup warm water, around 80 degrees F
- 3 cups bread flour, plus extra for dusting
- 1 1/2 tsp fine sea salt
- 1 tbsp olive oil, optional, adds tenderness to the crumb
Instruction
Feed your sourdough starter 4 to 8 hours before you plan to bake. It should be bubbly, doubled in size, and at its peak activity when you use it.
Add the warm water and active sourdough starter to the bread machine pan first, followed by the bread flour and salt. If using olive oil, add it now.
Select the Dough cycle on your bread machine and press Start. Let the machine mix and complete its first rise, which typically takes 90 minutes to 2 hours depending on your machine.
Once the dough cycle finishes, check the dough. It should be smooth, slightly tacky, and have risen noticeably. If it looks dense or has not risen, your starter may not have been active enough.
Remove the dough from the pan and shape it into a round or oval loaf on a lightly floured surface. Place it seam-side down into a well-floured proofing basket (banneton) or a bowl lined with a floured towel.
Cover loosely and allow the shaped dough to proof at room temperature for 1 to 2 hours, or refrigerate overnight for a deeper sour flavor and easier scoring.
Preheat your oven to 450 degrees F (230 degrees C) with a Dutch oven inside for at least 30 minutes.
Carefully turn the dough out onto a sheet of parchment paper. Score the top with a sharp lame or serrated knife, making one confident slash about 0.5 inch deep.
Lower the dough on the parchment into the hot Dutch oven. Cover with the lid and bake for 20 minutes.
Remove the lid and continue baking for 20 to 25 minutes until the crust is deeply golden brown and the internal temperature reads 205 to 210 degrees F (96 to 99 degrees C).
Transfer the loaf to a wire rack and allow it to cool for at least 1 hour before slicing. Cutting too early will result in a gummy crumb.
Equipment
- Bread machine with a Dough cycle
- Dutch oven (5 to 7 quart)
- Banneton proofing basket or bowl with a floured towel
- Bench scraper
- Bread lame or sharp serrated knife
- Parchment paper
- Instant-read thermometer
- Wire cooling rack
Notes
Serving and Storing Your Sourdough
Fresh sourdough is one of life's genuine pleasures. Serve it warm with good salted butter, alongside a hearty soup, or sliced thick for avocado toast. It holds up beautifully to strong toppings because the crumb is sturdy and the crust provides real structure.
Storage tips:
- Wrap cooled bread in a clean linen or cotton kitchen towel and keep it at room temperature for up to 3 days. Avoid plastic, which traps moisture and softens the crust.
- To revive day-old bread, place the whole loaf directly on the oven rack at 350 degrees F for 8 to 10 minutes.
- Slice and freeze any bread you will not finish within 3 days. Frozen slices toast beautifully straight from the freezer.
Once you see how straightforward this process is, sourdough how to get started will never feel like an intimidating question again. This bread machine method lowers the barrier to entry without sacrificing a single bit of that flavor you fell in love with. Bake it once, and it becomes part of your weekly routine.