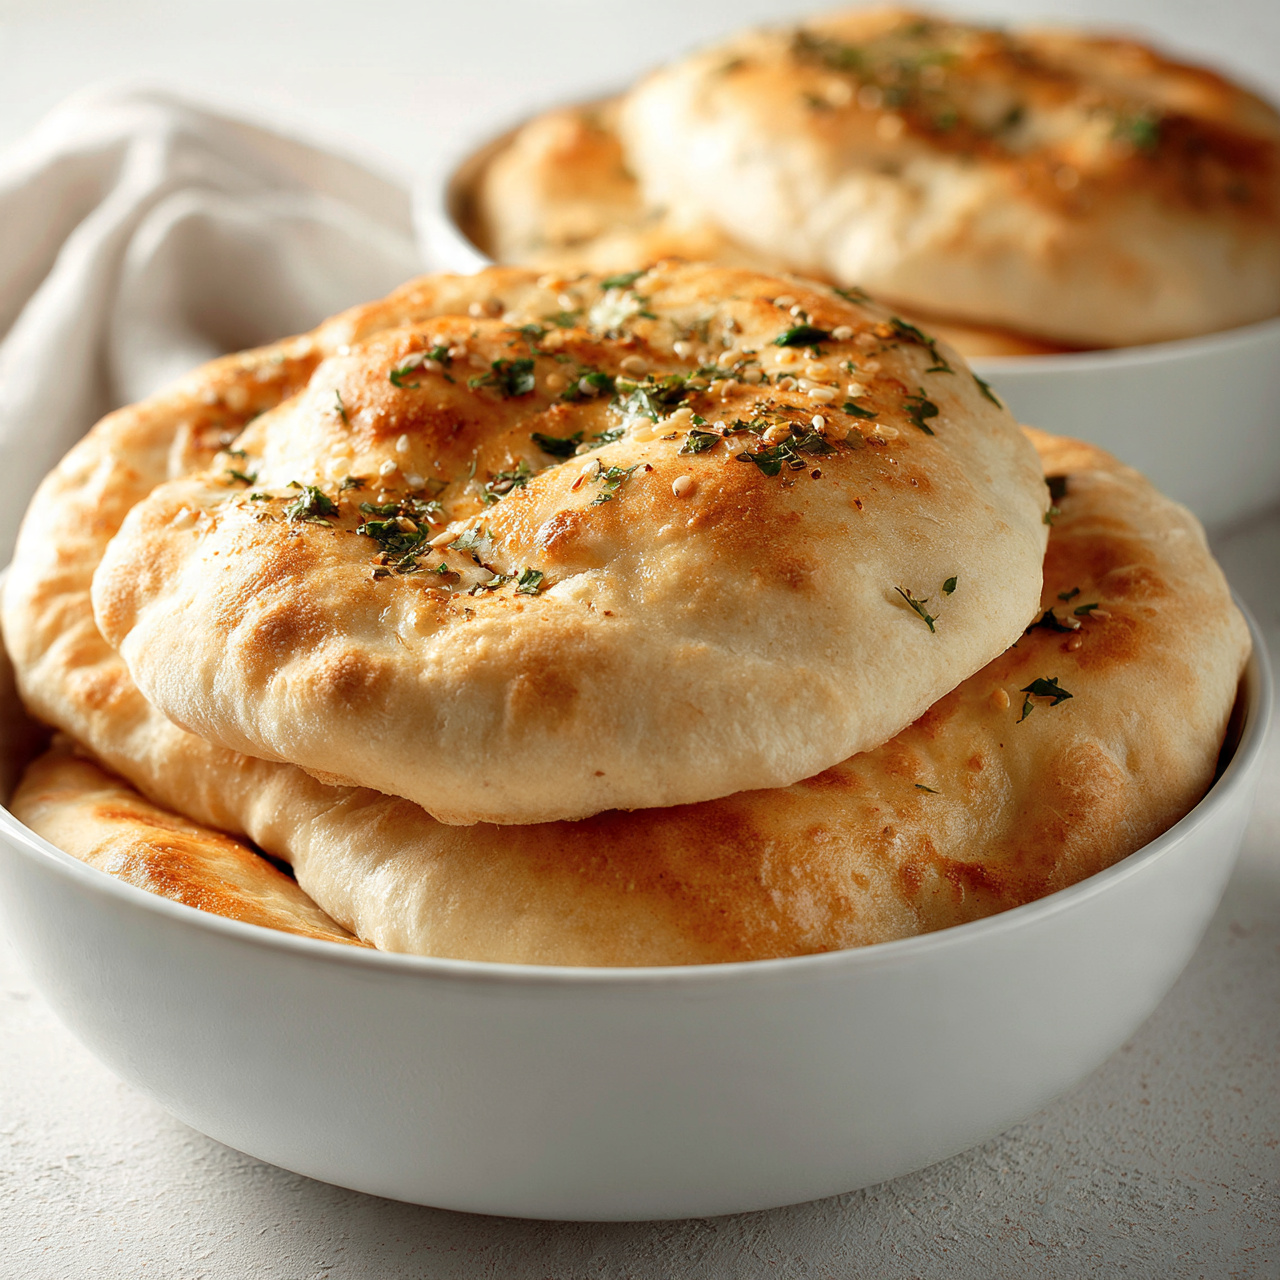
Sourdough Pita Bread (Easy Sourdough Discard Recipe)
This easy sourdough pita bread uses your sourdough discard to create soft, pillowy pockets with a gentle tang. A beginner-friendly recipe that comes together in under an hour.

The Sourdough Discard Recipe You Will Actually Make Every Week
If you have been maintaining a sourdough starter for any length of time, you know the quiet guilt of pouring discard down the drain. It feels wasteful, especially when that tangy, fermented batter is practically begging to become something delicious. These sourdough pita breads are one of the very best things you can make with it, and they are so quick and satisfying that they might just become your new default discard recipe.
This is an easy beginner sourdough bread project in the best way. There is no overnight ferment, no complex shaping, and no special scoring technique. Just a simple, forgiving dough that puffs into beautiful, pillowy pockets right in a hot skillet. Whether you are stuffing them with falafel and tzatziki, dipping them into hummus, or tearing them apart at the dinner table, these pitas deliver every single time.
Using good-quality flour and a reliable cast iron skillet makes a noticeable difference in how evenly your pitas cook and how dramatically they puff. A kitchen scale is also a genuine help here, especially when you want consistent rounds that cook at the same rate.
Why Sourdough Discard Makes the Best Pita Bread
Traditional pita bread is wonderful on its own, but adding sourdough discard brings something extra to the table. The natural fermentation in your discard gives the dough a subtle tang that plain yeast breads simply cannot replicate. It also adds a slight chewiness and depth of flavor that makes these pitas taste like something you would find at a really good Mediterranean restaurant.
And unlike many sourdough discard pita bread recipes that require hours of fermentation, this version uses a small amount of instant yeast alongside your discard. That combination means you get the flavor benefits of sourdough with the reliable rise and timeline of a yeasted dough. It is genuinely one of the easiest quick sourdough discard recipes you can keep in your rotation.
Chef's Tip: Your discard does not need to be fresh or recently fed for this recipe. Even discard that has been sitting in the fridge for a week will work beautifully. The older and more sour it is, the more pronounced the tang in your finished pitas.
How to Get That Perfect Pita Pocket
The iconic pocket inside a pita is not magic. It is science, and once you understand it, you will nail it every time.
When a thinly rolled round of dough hits a very hot surface, the moisture inside turns to steam almost instantly. That steam has nowhere to go except up, and it inflates the two layers of dough apart like a little balloon. A few keys to making this happen reliably:
- Roll the dough evenly. Thick spots will not puff as well as the rest of the round. Aim for a consistent 0.25-inch thickness across the whole surface.
- Get your pan genuinely hot. Medium-high heat is the minimum. If you can hold your hand 2 inches above the surface for more than 3 seconds, it is not hot enough yet.
- Do not press down on the pita while it cooks. Let the steam do its work.
- Wrap finished pitas in a towel immediately. The trapped steam keeps them soft and pliable as they cool, which is exactly what you want for folding and stuffing.
If a pita does not puff fully, it is still completely delicious. It will just be a slightly flatter flatbread rather than a pocket bread, and honestly, that is still wonderful.
Tips for Beginners Making This Sourdough Discard Pita Bread Recipe
This is a genuinely forgiving dough, which makes it a fantastic easy beginner sourdough recipe. But a few small things will make your results even better:
- Do not over-flour the surface. A slightly tacky dough produces a softer pita. Add flour only if the dough is actually sticking to your hands or the surface.
- Let the dough rest fully. Even the 30-minute rest makes the dough more elastic and easier to roll out thinly without it springing back.
- Cook one at a time. It is tempting to crowd the pan, but a single pita per cook gives you better control over the heat and the puff.
- Use a cast iron skillet if you have one. Its heat retention is unmatched for this kind of high-heat cooking.
Chef's Tip: If you want to prep ahead, you can make the dough and refrigerate it after the initial rest. It will keep overnight and actually develop more flavor. Let it come back to room temperature for about 20 minutes before rolling and cooking.
Ready to put your discard to its very best use? Here is the full step-by-step sourdough pita bread recipe:
Sourdough Pita Bread (Easy Sourdough Discard Recipe)
This easy sourdough pita bread uses your sourdough discard to create soft, pillowy pockets with a gentle tang. A beginner-friendly recipe that comes together in under an hour.
Ingredients
- 2 cups all-purpose flour, plus more for dusting
- 1/2 cup sourdough discard, unfed, at room temperature
- 1/2 cup warm water, around 110 degrees F
- 1 tsp instant yeast
- 1 tsp granulated sugar
- 1 tsp fine sea salt
- 1 tbsp olive oil, extra virgin, plus more for bowl
Instruction
In a small bowl, combine the warm water, instant yeast, and sugar. Stir briefly and let it sit for 5 minutes until slightly foamy.
In a large mixing bowl, whisk together the flour and salt. Add the sourdough discard, olive oil, and the yeast mixture.
Mix until a shaggy dough forms, then turn it out onto a lightly floured surface and knead for 6 to 8 minutes until smooth and slightly tacky but not sticky.
Lightly oil the bowl, place the dough inside, and cover with a clean kitchen towel or plastic wrap. Let it rest at room temperature for 30 to 45 minutes until slightly puffed.
Divide the dough into 8 equal pieces. Roll each piece into a smooth ball, then use a rolling pin to roll each ball into a round about 7 inches in diameter and roughly 0.25 inches thick.
Heat a cast iron skillet or heavy-bottomed pan over medium-high heat until very hot. No oil is needed.
Cook each pita one at a time for 1 to 2 minutes per side. The pita should puff up and develop dark golden spots. If it does not puff, your pan may not be hot enough.
Remove from the pan and wrap immediately in a clean kitchen towel to keep them soft and allow them to steam. Repeat with remaining rounds.
Serve warm or allow to cool completely before storing.
Equipment
- Large mixing bowl
- Small bowl
- Rolling pin
- Cast iron skillet or heavy-bottomed pan
- Kitchen scale (optional but recommended)
- Clean kitchen towel
Notes
Serving Ideas and What to Do with Leftover Pitas
Fresh sourdough pita bread is endlessly versatile. Here are a few favorite ways to use them:
- Classic mezze plate with hummus, baba ganoush, olives, and feta
- Pita sandwiches stuffed with grilled chicken, lettuce, tomato, and cucumber tzatziki
- Homemade pita chips by brushing leftover pitas with olive oil, cutting into wedges, and baking at 375 degrees F until crisp
- Quick flatbread pizza using pita as the base with sauce, mozzarella, and your toppings of choice
- Simple snack torn warm and dipped in good olive oil with a pinch of flaky salt
Leftover pitas store well at room temperature in an airtight bag for two days, and they freeze beautifully for up to two months. Just stack them with a small piece of parchment between each one so they do not fuse together in the freezer. Reheat them in a dry skillet for about a minute per side and they come back to life almost perfectly.